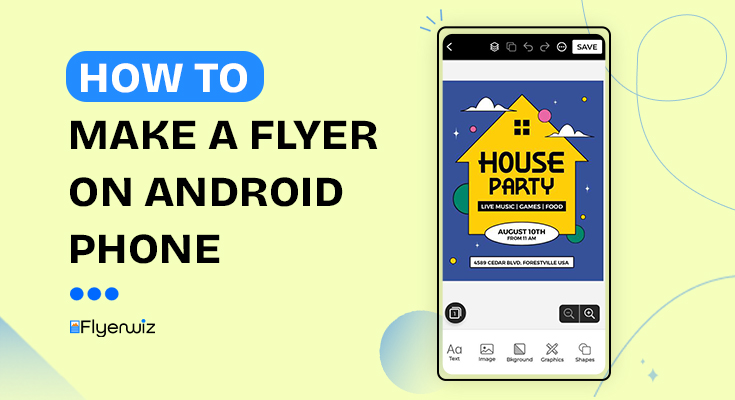
A flyer is an effective marketing tool that can help promote a business, product, service, or event. It’s a piece of paper or cardstock that can be distributed in high-traffic areas or directly to a target audience to generate interest and drive action. In this guide, we will explore the steps for how to make a flyer on an Android phone, as well as tips and tricks for designing an effective flyer.
Table of Content
1. Importance of Flyers in Marketing
2. Introducing Flyerwiz
3. Step-by-Step Guide on How to Make a Flyer
4. Point to Consider When you Design a Flyer
5. Standard Flyer Size
6. Flyer Printing and Distributing
4. Final Words
5. FAQs
Importance of Flyers in Marketing
Flyers play a crucial role in the world of marketing, serving as a versatile and cost-effective tool for businesses to convey their messages to a broad audience. These small, printed pieces of promotional material may seem old-fashioned in our digital age, but they remain highly relevant and impactful for various reasons. Here’s an exploration of the importance of flyers in marketing:
- Tangible Impact: Flyers engage the sense of touch, making information more memorable.
- Targeted Distribution: Businesses can reach specific audiences by distributing flyers strategically.
- Cost-Effective: Mass production lowers costs, making flyers an attractive option for businesses with limited budgets.
- Immediate Attention: Flyers quickly capture attention with compelling visuals and content.
- Versatility: They can be used in various marketing contexts, adapting to different needs.
- Measurable Results: Tracking responses and conversions helps assess ROI and refine marketing strategies.
- Branding and Consistency: Flyers reinforce brand identity and message, ensuring trust and recognition.
- Information-Rich: Flyers convey comprehensive details about products, services, or events.
- Complement to Digital Marketing: They can drive online traffic through QR codes or web links, enhancing reach.
- Eco-Friendly Options: Environmentally responsible printing choices cater to growing environmental concerns.
To create a visually appealing flyer, it is necessary to choose a flyer maker app. They’re cost-effective, eliminating the need for professional designers and extensive software. You can always rely on the Flyerwiz app to design an attractive flyer in no time.
Introducing Flyerwiz
Flyerwiz is a cutting-edge flyer maker app designed to empower users to create eye-catching flyers effortlessly. Our intuitive online platform offers access to a diverse collection of over 20,000+ professionally designed flyer templates, catering to various industries, events, and promotional needs.
Join the thousands of individuals, entrepreneurs, and businesses who have harnessed the power of Flyerwiz to elevate their marketing and promotional efforts. Whether you’re a startup, a small business, or an established enterprise, Flyerwiz is your go-to solution for crafting professional flyers that leave a lasting impression. Experience the convenience of the flyer maker app today and revolutionize the way you create flyers.
Let’s go ahead and explore the steps of flyer-making with Flyerwiz.
Step-by-Step Guide on How to Make a Flyer
Creating a flyer is a great way to promote an event, product, or service. Here’s a step-by-step guide on how to make a flyer:
Let’s explore each step in detail:
Step 1: Download the Flyer Maker App
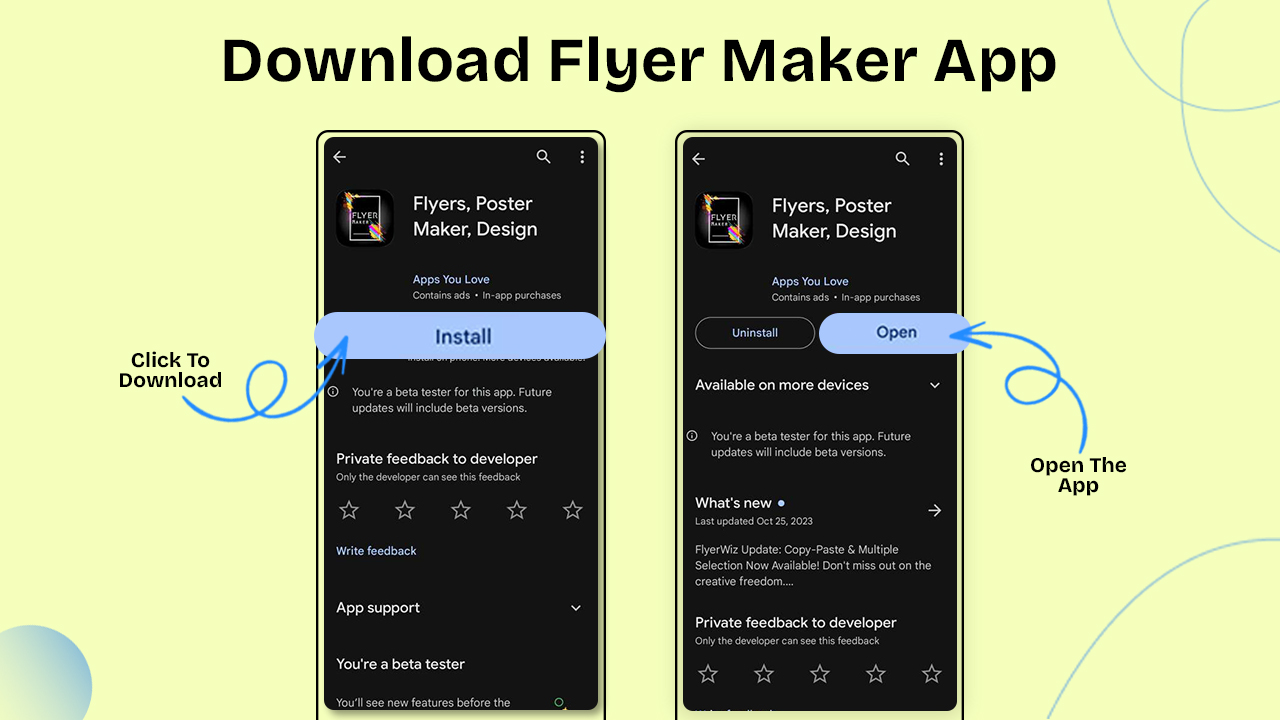
The first step in creating a flyer on your Android phone is to download a flyer maker app from the Google Play Store. Once you’ve downloaded the app, open it and get started.
Step 2: Choose a Template
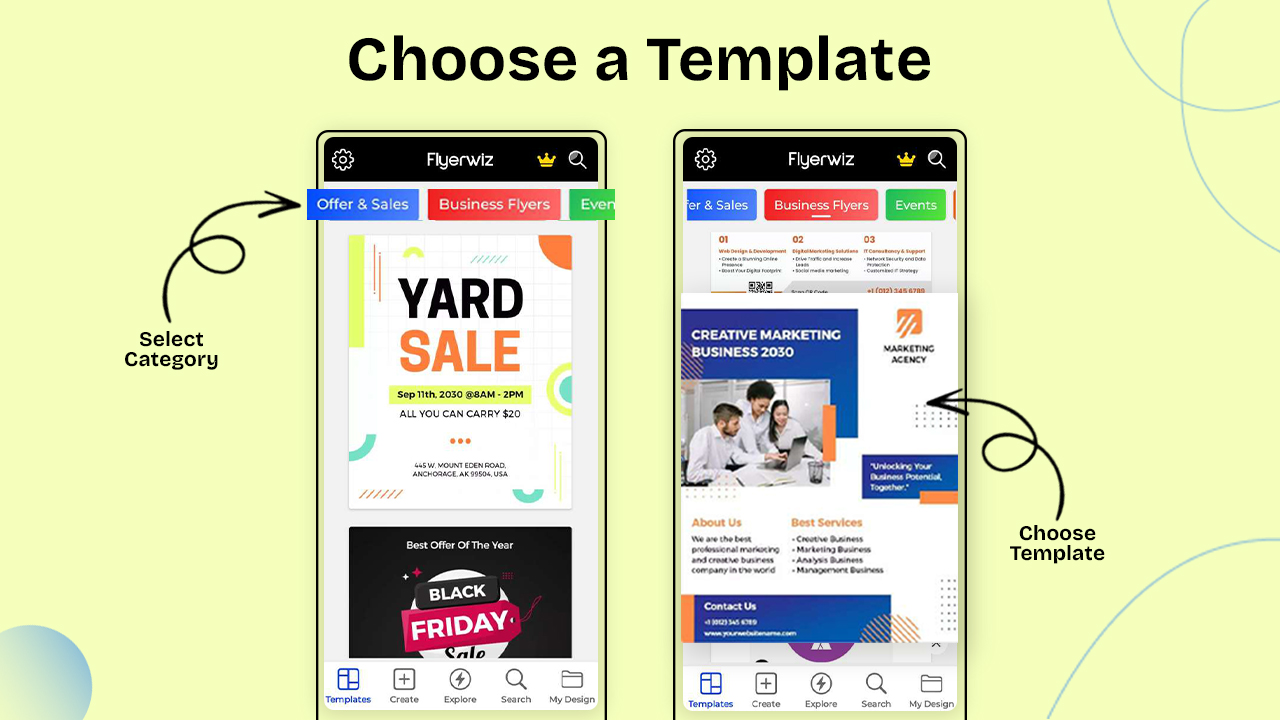
Once you’ve opened the flyer maker app, you’ll be presented with a range of template options to choose from. These templates come in various styles and themes, making it easy for you to select one that matches the purpose of your flyer. To discover the ideal design, you can filter the designs by categories like event, or sale.
Step 3: Customize your Flyer Template
After selecting a template, it’s time to personalize your flyer to make it unique and relevant to your needs. This step involves several subtasks:
1. Change the Background
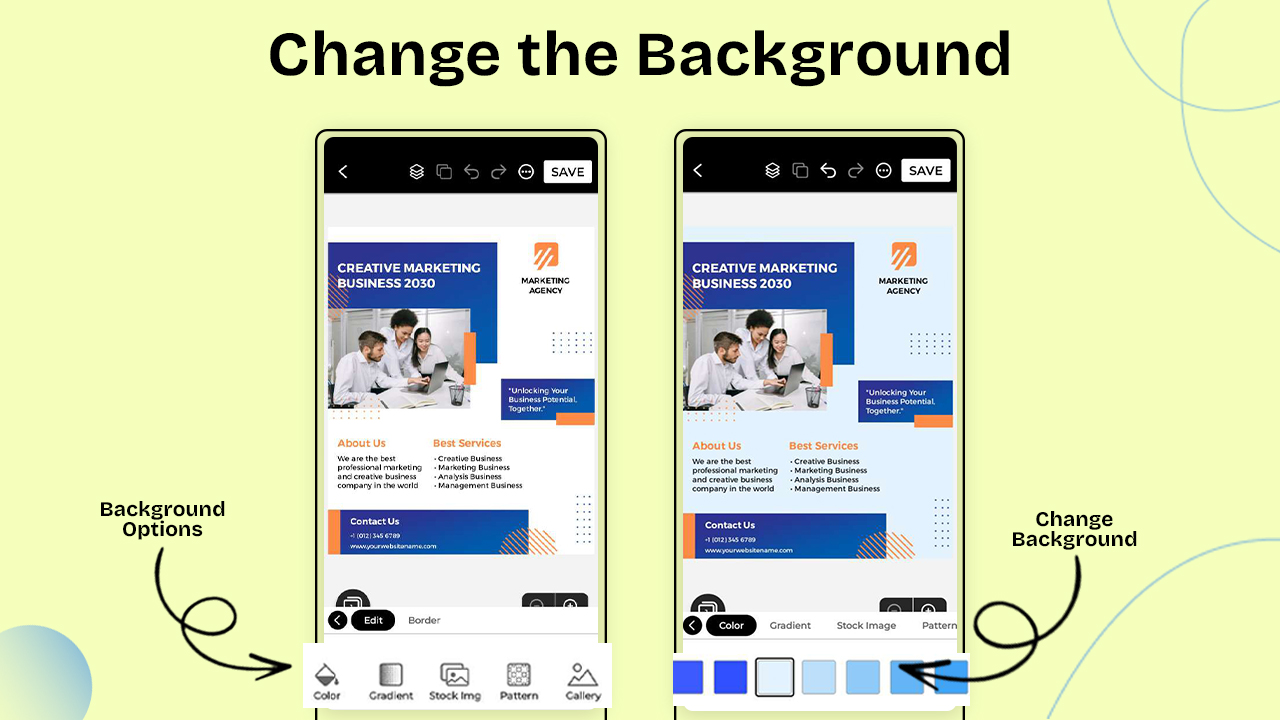
You can typically change the background of the flyer by selecting a new color, or pattern, or even uploading your own image. Choose a background that complements the theme and message of your flyer.
2. Edit Text Content
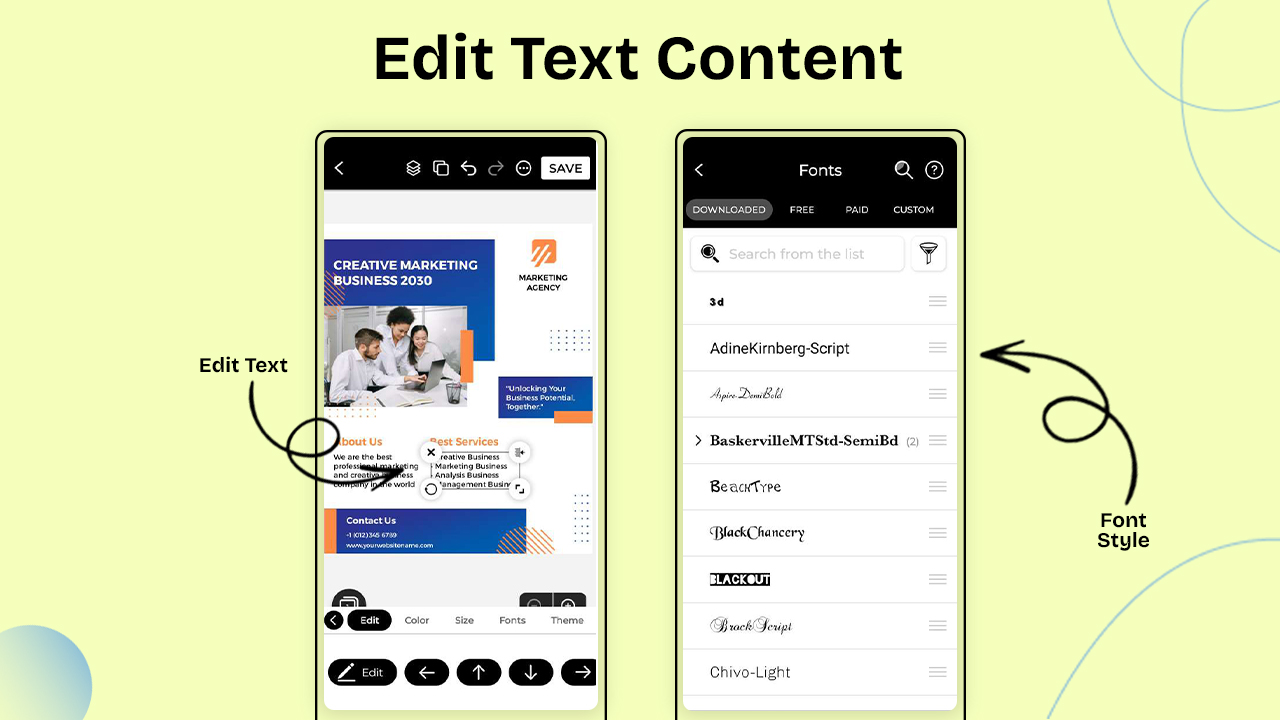
You can modify the text on the flyer to include your message, event details, contact information, or any other relevant content. Customize the font style, size, and color to make the text visually appealing and easy to read.
3. Add or Change Image
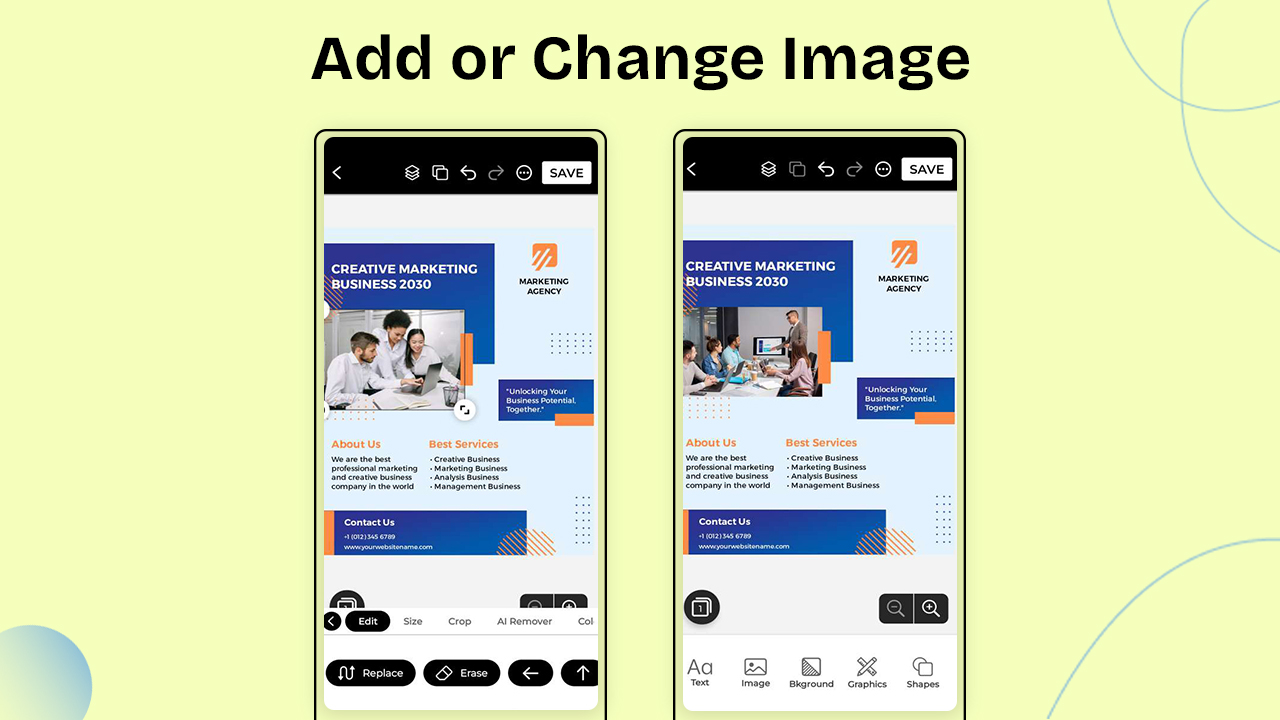
You can upload photos from your phone’s gallery or choose from the app’s image library. Ensure that the images you select are high-quality and relevant to your flyer’s purpose.
4. Add Graphic Elements

Enhance your flyer by adding graphic elements such as shapes, icons, and decorative elements. These can be used to create visual interest and draw attention to specific parts of the flyer.
Step 4: Save and Share
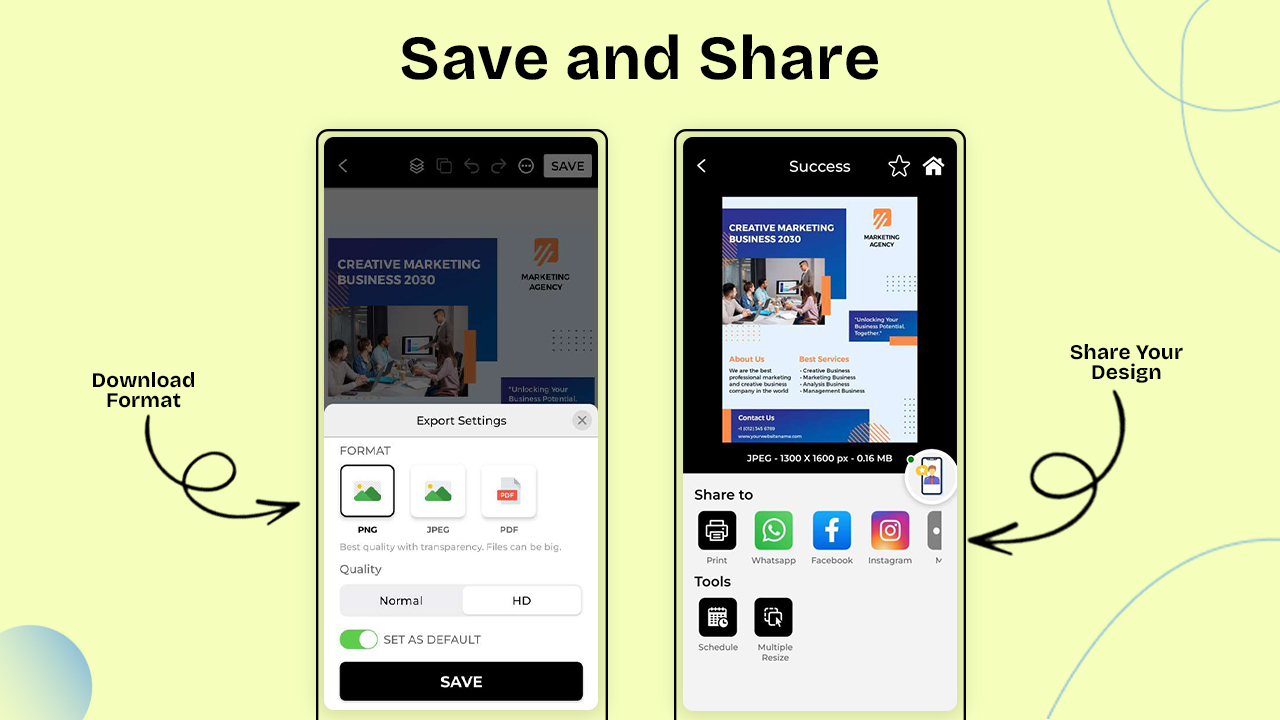
The flyer maker app allows you to save your design in PDF, JPG, and PNG formats. Also, you can share your flyer directly from the app to social media platforms or print it out to distribute your flyers to the local community.
Points to Consider When You Make a Flyer
Flyers are excellent marketing tools that can capture attention and convey important information in a visually appealing way. Whether you’re promoting an event, advertising a product, or raising awareness for a cause, following these best practices will help you create an effective and eye-catching flyer.
1. Keep It Simple and Focused
A cluttered flyer can be overwhelming and confusing for readers. Keep your design simple, with a clear focal point that aligns with your objective. Avoid overcrowding the flyer with excessive text or too many images.
2. Use Attention-Grabbing Headlines
Craft a compelling headline that immediately captures attention and entices readers to learn more. Additionally, use bold fonts and contrasting colors to make the headline stand out. Incorporate your main message and keywords into the headline.
3. Utilize Engaging Images and Graphics
Visuals play a significant role in attracting readers’ attention. Include high-quality images and graphics that complement your message. Avoid using generic stock photos and opt for original or relevant visuals instead.
4. Balance Colors and Fonts
Maintain a harmonious color scheme that aligns with your brand or event theme. Stick to a limited color palette to avoid visual overload. Similarly, use a maximum of two or three fonts to ensure readability and consistency.
5. Organize Information with a Hierarchy
Arrange information in a hierarchical order, with the most critical details emphasized prominently. As well as use headings, subheadings, and bullet points to create a logical flow and guide readers through the flyer.
6. Incorporate White Space
Allow sufficient white space around your content and graphics to create a clean and balanced layout. White space enhances readability and prevents the flyer from looking cluttered.
7. Include a Strong Call-to-Action
Every effective flyer should have a clear call-to-action (CTA) that prompts readers to take the desired action. Whether it’s visiting a website, making a purchase, or attending an event, make the CTA stand out.
8. Proofread
Before printout, use a grammar checker to check for grammar and spelling errors that can diminish the professionalism of your flyer. Always proofread your content carefully before printing or distributing the flyer.
9. Choose the Right Paper and Printing
Select a high-quality paper that suits the purpose of your flyer. For formal events or promotions, opt for glossy or matte finishes. For eco-friendly initiatives, consider using recycled paper.
10. Test Before Mass Distribution
Before printing a large batch, print a few test copies to check colors, layout, and overall quality. Make any necessary adjustments before proceeding with mass distribution.
Standard Flyer Size
When you make a flyer for a Nodejs Development Company, it’s essential to consider the size to ensure it is both visually appealing and practical for distribution. The standard flyer sizes may vary depending on the region and the intended use of the flyer. Here are some common standard flyer sizes used in the United States:
- 8.5″ x 11″ (Letter Size): This is the most common standard flyer size and is equivalent to a regular letter-sized sheet of paper. It provides ample space for content and visuals, making it suitable for various purposes, such as event promotions, business announcements, and informational flyers.
- 5.5″ x 8.5″ (Half Letter Size): This size is ideal for creating compact flyers with less content. It is commonly used for smaller events, product promotions, or handouts with limited information.
- 4″ x 6″: This size is commonly used for postcard-style flyers. It’s great for quick and eye-catching promotions, invitations, or event announcements.
- 8.5″ x 14″ (Legal Size): A legal-sized flyer offers more vertical space, making it suitable for displaying detailed information or when you want to stand out from traditional letter-sized flyers.
- 11″ x 17″ (Tabloid Size): This larger size is suitable for more extensive and attention-grabbing designs. It is commonly used for event posters, announcements, or folded brochures.
For more in-depth details on flyer size check out this blog on flyer size guide.
Flyer Printing and Distributing
Flyer printing and distribution is a crucial step in getting your message or promotion to a wider audience. It involves turning your digital design into physical copies and delivering them to your target audience through various channels. Here’s a breakdown of the process:
Printing:
a. Choose a Printing Service: To get your digital flyer design onto physical paper, you’ll need to work with a printing service. You can opt for local print shops, online printing companies, or even print them yourself if you have the necessary equipment.
b. Select Paper Type and Size: Select the type of paper that suits your flyer’s purpose. Common options include glossy, matte, or recycled paper. Also, determine the size of your flyer, which can range from standard letter-size (8.5 x 11 inches) to smaller or larger formats.
c. Printing Quantity: Decide on the number of flyers you want to print. This will depend on your budget and the size of your target audience.
d. Proofreading: Before printing, carefully proofread your flyer to catch any errors in text, images, or design. Ensure that all information is accurate and up to date.
e. Printing Options: Consider printing options like color choices, single-sided or double-sided printing, and special finishes (e.g., UV coating or embossing) to make your design stand out.
f. Printing Costs: Get quotes from different printing services to compare costs. Consider factors like printing quality, turnaround time, and shipping costs if you’re ordering online.
Distribution:
There are several ways to distribute your flyers, including:
- Direct Mail: Send your flyers to a list of addresses, either purchased or compiled from your customer database.
- Hand-to-Hand Distribution: Have individuals or a team distribute your flyers in high-traffic areas, events, or specific locations where your target audience is likely to be present.
- Local Businesses: Collaborate with local businesses, such as cafes, stores, or community centers, to display your flyers at their locations.
- Bulletin Boards: Post flyers on community bulletin boards, where people frequently check for local events and services.
- Events: Hand out flyers at trade shows, fairs, exhibitions, or community events relevant to your message.
- Online Promotion: You can also distribute digital versions of your flyers through email, social media, or your website.
Also, Read :
Final Words
By following these steps, you can create an effective flyer that effectively communicates your message and encourages potential clients. In Addition remember to keep the flyer simple, visually appealing, and easy to read. Use high-quality images and make sure the text is easy to read. With the flyer maker app, you can create professional-looking flyers quickly and efficiently as per your business needs.
FAQs
How to Make a Business Flyer?
- Define your Objectives: Determine the purpose of your business flyer and what information you want to convey to your target audience.
- Use Eye-Catching Graphics: Include relevant images or illustrations that resonate with your business and grab attention.
- Craft Compelling Copy: Write concise and persuasive content that highlights the benefits of your products or services.
- Add Contact Information: Make sure to include your business name, logo, address, phone number, email, as well as website URL. Don’t hesitate to use an SPF record checker to prevent email spoofing and phishing attempts.
- Choose the Right Fonts: Select clear and readable fonts that align with your brand’s identity.
- Balance Text and White Space: Avoid clutter by leaving enough white space and organizing information in a clean layout.
- Incorporate Branding: Maintain consistent colors, fonts, and design elements to reinforce your brand identity.
How to Make an Event Flyer?
- Determine the Event Details: Know the date, time, location, theme, and any other important information about the event.
- Pick a Design Style: Choose a design that complements the event’s theme and target audience.
- Write Engaging Text: Craft a catchy headline, including event highlights, and provide clear instructions on how to attend.
- Use a Call-to-Action: Encourage people to attend by incorporating a compelling call-to-action, such as “Be a Part of the Fun – Register Now!”, “Join Us for an Unforgettable Evening – Get Your Tickets!”, “Make Memories with Us – Buy Your Tickets!”, “Get in on the Excitement – Book Your Spot!”, “Ready to Party? Grab Your Passes!”.
- Optimize for Social Media: Consider creating a digital version of the flyer to share on social platforms.
- Print in High Resolution: If printing physical copies, ensure a high-quality resolution for crisp visuals.
Why Flyer is Important?
Flyers are important for several reasons, as they serve as a versatile and effective tool for communication and promotion such as Cost-Effective Advertising, Targeted Marketing, Quick and Easy Information Sharing, and Brand Awareness.
How to Make a Food Menu Flyer?
- Mouth-Watering Images: Include high-quality images of the most delicious dishes on your menu.
- Clear Menu Sections: Organize the menu into categories like appetizers, main courses, desserts, etc.
- Item Descriptions: Write enticing descriptions for each dish to entice readers.
- Pricing: Display the prices clearly and legibly.
- Branding: Incorporate your restaurant’s logo, colors, and design elements.
- Contact and Location: Add your restaurant’s contact number, website, and address for ordering or reservations.
- Special Offers: If applicable, include any special deals, promotions, or discounts.